Thursday 30 December 2010

Yes, Yes I know. It has indeed been a long time coming.

It is understandable if the few of you who do sometimes visit this blog thought that we'd shut down, I must admit this is due to the fact that there wasn't much time for any work on project UAV since the summer holidays. However since exam season finished and I got my last cheque from the Arkwright Scholarship I decided that I owe it to the project to make some progress.
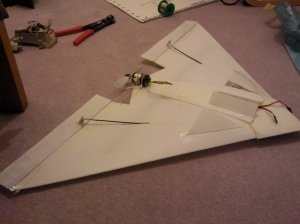
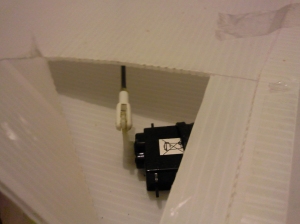
So I bought some components and did a little tinkering. Here are the results...
As you can see, in the world of amateur UAV design, size matters.
The 70mm diameter ducted fan at the bottom of the pic, produced quite a kick but wasn't anywhere near enough for the airframe. As of such I had to upgrade to the 340mm outboard prop to produce any reasonable thrust. Hopefully I should have some bench test vids up on the blog a little later.
So I suppose what one should take away from this is the fact that a cause is never lost as long as you keep fighting for it.
This UAV will fly someday and with my current burst of enthusiasm I am hopeful for a flight some time next feb. Fingers Crossed.

Tuesday 11 May 2010

Wing progression


Today appeared to be pretty productive, got quite a bit done in an hour, managed to get the base of the wings glued on, and am halfway through gluing on the upper skin. Twinwall is again proving hard to trim in a nice straight line, especially if you're cutting diagonally across the flutes, so it's a bit messy.


I've had to secure some parts with tape (due to mistakes/trying to get the twinwall to bend), so it does look a bit shabby, but the finished product will be much nicer.


The more I look at the pictures, the more shabby it becomes. I swear it looked nicer in the workshop.

Things to do next session:
  • Finish the gluing
  • Construct the ailerons
  • Attach the wing to the fuselage
I'm still thinking about the optimum angle of attack for our plane (if any). I was initially going for zero, but recent suggestions have said otherwise...

Friday 7 May 2010

Pt. 2


Some more pictures - we've marked out the twinwall and we are going to glue the bottom and the top section together ( ideally we would have done the bottom section, then folded across the front of the wing, but our material unfortunately wasn't large enough).

After the long break..


Yes, I realise there hasn't been an update for quite some time now, but now we are striving to get as much work done as possible before the term ends. But first, a few pictures and updates, to get an idea of the progress we've made.


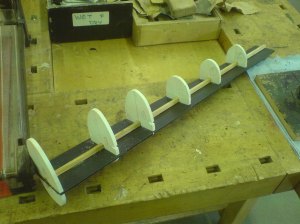
We've completely glued the wing ribs to the spar and also have marked out the twinwall to skin the wing with (yes, I know this is very littel progress but holidays have limited, well absolutely blocked, access to the workshop)

Wednesday 24 March 2010

Nothing much to say

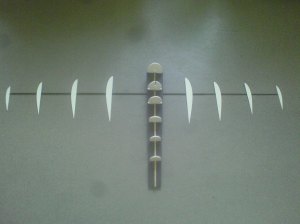
The MQ-5 Hunter by Northrop Grumman definitely seems like the kind of plane I want to see our project evolving into (on a different scale of course, and our ribs below definitely seem quite amateurish compared to the months of research and development that went into the Hunter).


Didn't really do much last tuesday, just finished off the wing ribs (turned out we had completely missed out a pair!) and finished drilling all the holes for the carbon spar, speaking of which, is completed.

Tuesday 16 March 2010

Picture Update


Sunday 14 March 2010

Making the wings + attachment?

We finished the fuselage spine (and we cut a few more holes in it to allow for cable management). We've been working on some foam nosecones and underbody to take the landing, but unfortunately a certain someone made a right mess of it. Anyhows, we'll probably be evolving it into an acrylic nosecone for a FPV camera mounting.

As far as the wings ar concerned, the most of the wing ribs have been completed, shaped and sanded to size, but we've still to add weight-saving holes and a hole for the carbon spar to go through. After that it's a case of putting them on the spar and skinning it with some 2mm twinwall. Once that's done, we have the nightmare of attaching it to the fuselage, a problem presented due to the lack of foresight on my part. I was initially hoping for some kind of removable wing attachment, but that dream is long gone...

After that, we've to sort out the control surfaces, and I've got a pretty good of how the ailerons are going to work, as well as the elevators. We've also acquired some new hardware, as our previous electronics were, well, a bit cheap (and they definitely won't be able to cope with the bigger airframe).

Partner's comment repost

[This is a comment from my partner, reposted as a post as he forgot the password to the blog, as it is somewhat important]

It’s probably about time that I say something, so here goes.
In terms of actual progress the completion of phase 1 was a pretty fulfilling experience seeing as it really pissed me off in its initial stages. The transgression into phase 2 is just as my colleague says; in its infant stages whereby the physical airframe needs to be constucted from twinwall, sintra and cabon fibre alike.
If I decide to grace this blog with my presence at some point in the future, and thats a big IF, i’ll probably be updating this progress sheet with intel on the electronic side of the project.
At this current moment in time the autopilt system is to be installed using the ardupilot system. I have recently come into possession od the various processor boards, GPS Modules and airspeed indicators but for the time being it seems that the airframe is going to require more attention.

And that’s about it…

So long.

Saturday 13 February 2010

Phase 2!

After finally completing phase 1 of our project, we can safely move onto the next stage. The test flights so far have been relatively successful, with many of the failure stemming from my inability to fly. But hopefully that should be remedied soon.

We have decided on the shape of measurements of our phase 2 plane, and I will try to put some designs up (it was derived from the design mentioned in the last post) and hopefully it should work out well. I'll be crunching some numbers on the numerous handy flight calculators online, to just check that we haven't made some horribly fatal errors.

So far we've made the basic fuselage shape, using some 5mm sintra for the cross-sections with a balsa wood spine (pics coming soon), and we'll be skinning it with twinwall, sintra, or whatever material satisfies both the weight and strength conditions. Once that is done, we should be making the wings, again with sintra cross-sections, and 2mm twinwall for the actual wing itself, and putting a telescoping carbon spar to keep the wings level.

Monday 18 January 2010

Saturday 16 January 2010

Phase 1 redo

Due to numerous problems, I had to bring home the Mugi to fix several things, namely the pushrods, the servos, and try and get a better cockpit configuration. So far it's all gone well and the promising first flight is within reach - its rather annoying its taken so long to get here, but being new to rc planes I feel we have learnt many invaluable lessons, one of which is battery care (having possibly avoided an explosion!).

But everything has been fixed, and now I'm just waiting for Tuesday so we can get a proper flight going, having ordered a new battery charger and transmitter battery for monday. I finally took a couple of pictures:


Whilst I'm busy fixing the Mugi, P has been working on the airframe for our Phase 2, with emphasis on stability, and repairability. We've come across a good design from diydrones.com and, with some modifications, hope to use it for our project. We're still working on constructional techniques and exact dimensions, but we're thinking about 1.5m wingspan, and a 0.7m fuselage connected to a tailplane by two rods.